2021. 10. 28. 14:26ㆍServer
절차) ①패키지 확인 ②패키지 설치 ③패키지 시작 ④방화벽 확인 ⑤selinux 확인 ⑥패키지 상세 설정
*CentOS 7 사용
- 개요
앞선 글에서 Windows 운영체제로 DHCP 인프라를 구축하였다. 이번에는 Linux로 DHCP Server을 구축하고 Relay Agent역시 Linux로 구축해보겠다. 물론 예외와 예약 기능까지 다룰 것이다. 토폴로지도 전 글과 다르지 않다.

이번 대역대 역시 2개이며 조건도 동일하다.
---------------------------------------------------------------------------------------------------------------------------------- 1) 192.168.10.0/24
- 예외 : 192.168.10.1~192.168.10.99
2) 192.168.20.0/24
- 예약 : 192.168.20.100
----------------------------------------------------------------------------------------------------------------------------------
- DHCP Server_LA7
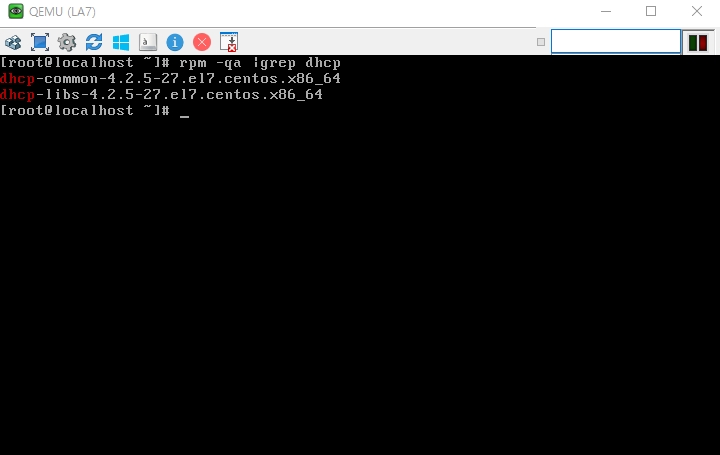
*IP 확인

①패키지 확인
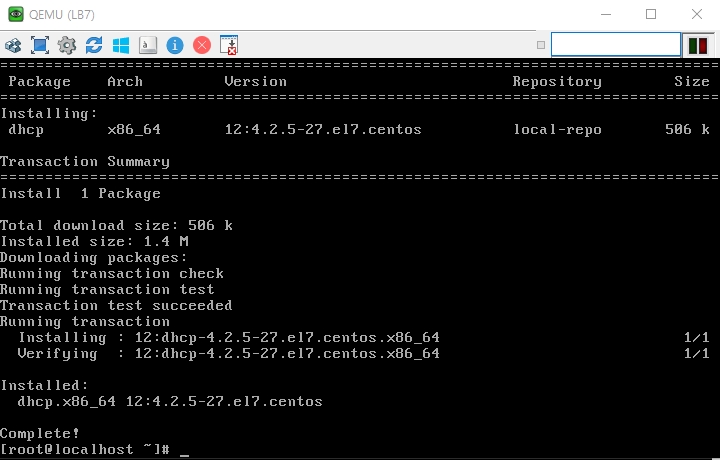
②패키지 설치

③패키지 시작

현재 DHCP 데몬이 작동하지 않는 이유는 패키지가 설정되어 있지 않기 때문이다. 이는 conf 파일을 손보면 작동이 되기 때문에 천천히 확인하면 된다.
④방화벽 확인


실제로 방화벽을 아예 내린 상태는 상당히 위험하다. 실습이기 때문에 편의상 내린것이지 실제로는 iptables를 통해 특정 포트만 허용하고 나머지는 거부하는 등 섬세한 보안을 구축하여야한다!
⑤selinux 확인

⑥패키지 상세 설정

DHCP Server을 구축하기 위해선 대역대를 파일을 만들어야 하는데 워낙 손이 많아가서 패키지 제작사에서 이렇게 샘플 파일을 미리 만들어 주었다.그렇기 때문에 ①/usr/share/doc/dhcp-* 디렉토리로 이동해 샘플 파일을 복사해주어야 한다. 지금 보기의 dhcpd.conf.example의 위의 파일은 IPv6를 위한 것이니 무시해도 된다. ②의 샘플파일을 /etc 밑의 dhcpd.conf라는 이름으로 복사해주어야 한다. 이 과정이 ③이다.
참고 1) 하나의 네트워크 범위 안에 2개의 대역대를 설치하고, 이를 하나로 묶어두는 것을 대범위라고 하는데, 우리는 그러한 상황이 아니니 대범위에 대한 언급은 제외하도록 하겠다.
예시> 192.168.10.0/24 {
- 192.168.10.1 ~ 192.168.10.127/25
- 192.168.10.129 ~ 192.168.10.190/26
}
참고 2) Linux는 '예외'라는 개념이 존재 하지 않기 때문에 배포 대역대를 작성시 'range' 명령어를 통해 제외하고 싶은 부분을 빼고, 자체적으로 제외하여야 한다!
이제 가장 중요한 dhcpd.conf 파일을 하나하나 뜯어보도록 하자.
# dhcpd.conf
#
# Sample configuration file for ISC dhcpd
#

# option definitions common to all supported networks...
# 지원되는 모든 네트워크에 공통적인 옵션 정의
option domain-name "example.org";
#도메인 이름 "example.org";
option domain-name-servers ns1.example.org, ns2.example.org;
#네임 서버(NS 레코드) ns1.example.org, ~;

default-lease-time 600;
#임대 시간(초 단위)
max-lease-time 7200;
#최대 임대 시간(초 단위)

# Use this to enble / disable dynamic dns updates globally.
# 활성 / 비활성화를 통해 전체적으로 동적DNS 업데이트 사용
#ddns-update-style none;

# If this DHCP server is the official DHCP server for the local
# network, the authoritative directive should be uncommented.
# 만약 이 DHCP Server가 공식 DHCP Server인 경우 권한 지시문을 수정 X
#authoritative;

# Use this to send dhcp log messages to a different log file (you also
# have to hack syslog.conf to complete the redirection).
# 이 설정을 통해 DHCP 로그 메세지를 다른 로그 파일로 전송(syslog.conf 수정 요망)
log-facility local7;
#syslog에 전달할 로그 등급을 local '7'으로 지정 = 모든 로그를 남기겠다.


# No service will be given on this subnet, but declaring it helps the
# DHCP server to understand the network topology.
# 현재 서브넷에 서비스가 주어지진 않았지만, 이 서브넷을 선언하면 DHCP 서버가
# 토폴로지를 이해하는데 도움이 됨 = 하위에 대범위 작성하면 된다.

#subnet 10.152.187.0 netmask 255.255.255.0 {
#} ##예시 대범위
#################################공통적인 옵션 정의 <끝>####################################

# This is a very basic subnet declaration.
# 하위는 기본적인 서브넷 설정(정의). 최소한의 설정 사항이며 없다면 에러가 뜨는 예시
# 예시이기 때문에 주석처리

#subnet 192.168.10.0 netmask 255.255.255.255 { 	# 서브넷 설정
#  range 192.168.10.1 192.168.10.254;		# 대역대 범위
#  option routers 192.168.10.254;		# 기본 게이트웨이 옵션
#}

# This declaration allows BOOTP clients to get dynamic addresses,
# which we don't really recommend.
# 이 설정(정의)는 BOOTP Clients를 위해 동적으로 IP를 얻도록 해주지만 그닥 추천하지 않는다.
#subnet 10.254.239.32 netmask 255.255.255.224 {
#  range dynamic-bootp 10.254.239.40 10.254.239.60;
#  option broadcast-address 10.254.239.31;
#  option routers rtr-239-32-1.example.org;
#}

# A slightly different configuration for an internal subnet.
# 하위는 실제 대역대 배포와 상세 설정

subnet 192.168.10.0 netmask 255.255.255.0 { 				# 배포 대역대 설정
  range 192.168.10.100 192.168.10.254;					# 배포 대역대 범위
  #option domain-name-servers ns1.internal.example.org;			# DNS 서버 옵션
  #option domain-name "internal.example.org";				# 네임 서버 옵션
  option routers 192.168.10.254;					# 기본 게이트웨이 설정
  #option broadcast-address 10.5.5.31;					# Broadcast 주소 설정 옵션
  default-lease-time 600;						# 임대 기간(초 단위)
  max-lease-time 7200;							# 최대 임대 기간(초 단위)
}
subnet 192.168.20.0 netmask 255.255.255.0 {
  range 192.168.20.1 192.168.20.254;
  option routers 192.168.20.254;
  default-lease-time 600;
  max-lease-time 7200;
}

# Hosts which require special configuration options can be listed in
# host statements.   If no address is specified, the address will be
# allocated dynamically (if possible), but the host-specific information
# will still come from the host declaration.
# IP뿐만 아니라 'Host 이름'도 임대한다. 임대하는 이름은 DNS 서버에서 가져옴으로
# 기본적으로 DNS 서버에 관한 설정이 전제되며, MAC주소와 IP를 통해 이름을 부여할 수 있다.

#host reservation {				# 예약자 명
#  hardware ethernet 0:0:c0:5d:bd:95;		# 예약자 MAC 주소
#  filename "vmunix.passacaglia";		# "~"파일에 저장
#  server-name "toccata.fugue.com";		# "~" 특정 도메인도 같이 부여 옵션
#  필요 없음으로 전체 주석
#}

# Fixed IP addresses can also be specified for hosts.   These addresses
# should not also be listed as being available for dynamic assignment.
# Hosts for which fixed IP addresses have been specified can boot using
# BOOTP or DHCP.   Hosts for which no fixed address is specified can only
# be booted with DHCP, unless there is an address range on the subnet
# to which a BOOTP client is connected which has the dynamic-bootp flag
# set.
# 쉽게 말해서 예약 설정

host book {					# 예약명
  hardware ethernet 00:00:00:00:0D:00;		# 예약자 MAC 주소
  fixed-address 192.168.20.100;			# 예약된 IP 주소
}

# You can declare a class of clients and then do address allocation
# based on that.   The example below shows a case where all clients
# in a certain class get addresses on the 10.17.224/24 subnet, and all
# other clients get addresses on the 10.0.29/24 subnet.
# 하위는 class 선언을 통해 주소 할당 수행방법. 아래 예시의 경우 기본적인
# Client들은 10.17.224.0/24 대역대를 얻고 주소 배분이 끝나면 10.0.29.0/24 대역대를 할당

#class "foo" {						# 클래스명
#  match if substring (option vendor-class-identifier, 0, 4) = "SUNW";
#}

#shared-network 224-29 {	#대범위 대범위명
#  subnet 10.17.224.0 netmask 255.255.255.0 {		# 첫번째 배포영역
#    option routers rtr-224.example.org;			# 기본 게이트웨이 옵션
#  }
#  subnet 10.0.29.0 netmask 255.255.255.0 {		# 두번째 배포영역
#    option routers rtr-29.example.org;			# 기본 게이트웨이 옵션
#  }
#  pool {						# 옵션 class
#    allow members of "foo";				# class "클래스명"과 같다면 허용
#    range 10.17.224.10 10.17.224.250;			# 범위 지정
#  }
#  pool {
#    deny members of "foo";				# class "클래스명"과 같다면 거부
#    range 10.0.29.10 10.0.29.230;			# 범위 지정
#  }
#}
여기서 필요 없는 부분은 모두 주석처리하였다!

*192.168.10.1.. 부터 range에 없다는 의미로 출력되었다. 무시하여도 된다.
- MAC 주소 (참고)_예약용

- DHCP Client_WA2003 & LA5
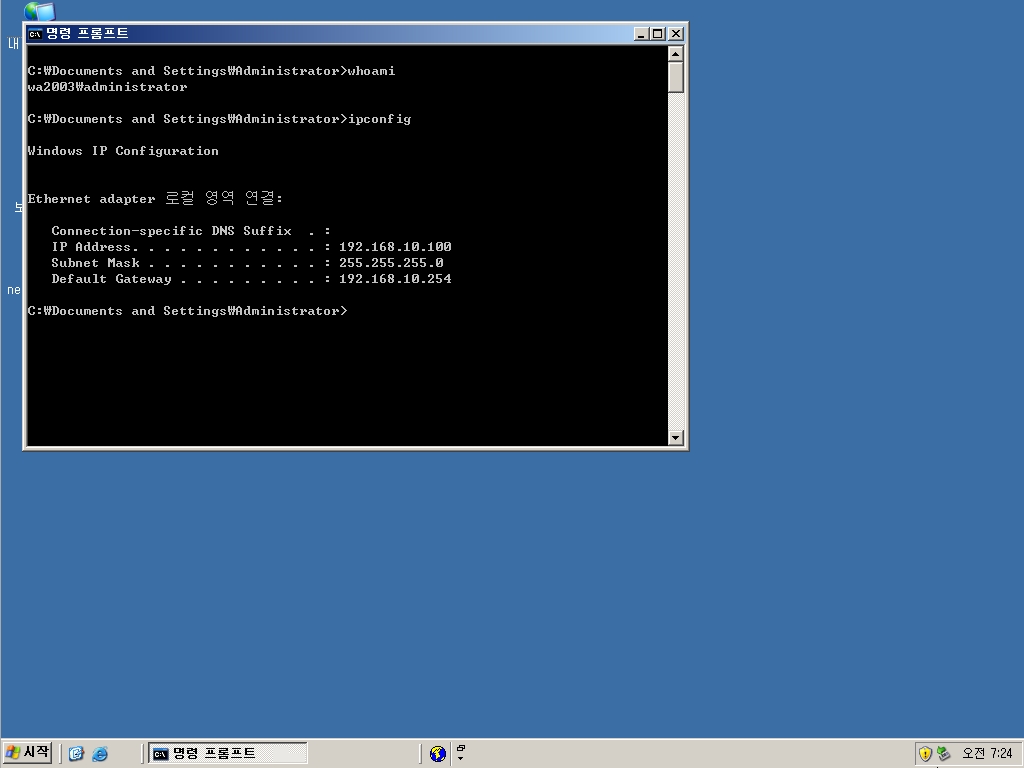

DHCP Client들이 정상적으로 IP를 받아온 모습이다.
- Relay Agent_LB7
Relay Agent의 설정이 Windows와는 다르게 다소 복잡한 편이다. 이 부분은 필자도 외우진 못할것 같다.


Relay Agent 서비스를 이용하기 위해 설정 파일을 옮기고 수정하는 작업이다. 이를 거쳐 Relay Agent로써 기능을 다할 수 있도록 수정 후 데몬 리스트에 적재시킬 것이다.

DHCP Server의 주소와 어떤 NIC로 동적 IP를 할당할 것인지 설정하는 것이다.
만약 eth1이 있으며, eth1에 스위치와 DHCP Client가 있다면 eth1로 작성해야 한다.

새로운 데몬을 적재하였기 때문에 systemctl --system daemon-reload로 데몬 리스트를 새로고침 해준다. 그 후 데몬 재시작
- DHCP Client_WA2012

예약된 IP로 정확하게 받아온 모습이다. 마지막으로 ping test를 해보면서 마치도록 하겠다.

'Server' 카테고리의 다른 글
| SAMBA & Quota (0) | 2021.11.08 |
|---|---|
| NAT(Network Address Translation) Server (0) | 2021.11.01 |
| DHCP(Dynamic Host Configuration Protocol)_Windows (0) | 2021.10.27 |
| DHCP(Dynamic Host Configuration Protocol) Server (0) | 2021.10.27 |
| VPN(Virtual Private Network) - Windows 심화 (0) | 2021.10.18 |